Gym Equipment Names and Uses: A Beginner Guide
Home ›Fitness Accessories and Technology
Here’s the reality: everyone who walks confidently around a gym floor was once completely lost on it. The difference isn’t talent — it’s just knowing the names, the purpose, and which machine to step on first. Every week you spend avoiding equipment out of confusion is a week of progress you’re leaving on the gym floor.
By the end of this guide, you’ll know the name, purpose, and muscle target of every major piece of gym equipment — plus exactly which machines to start on first. We’ll cover cardio machines, strength machines (upper and lower body), arm equipment, free weights, and even home and park gym gear — all organized using the Gym Confidence Stack framework, a three-layer progression system built specifically for beginners.
Gym equipment names and uses fall into three main categories — cardio machines, strength machines, and free weights — and knowing which to start on first is the key to building gym confidence without injury.
- The Gym Confidence Stack: Start with cardio, progress to selectorized machines, then graduate to free weights
- Best beginner machines: Leg press, lat pulldown, chest press, and stationary bike
- Arm equipment names: Cable curl station, preacher curl bench, and assisted dip machine
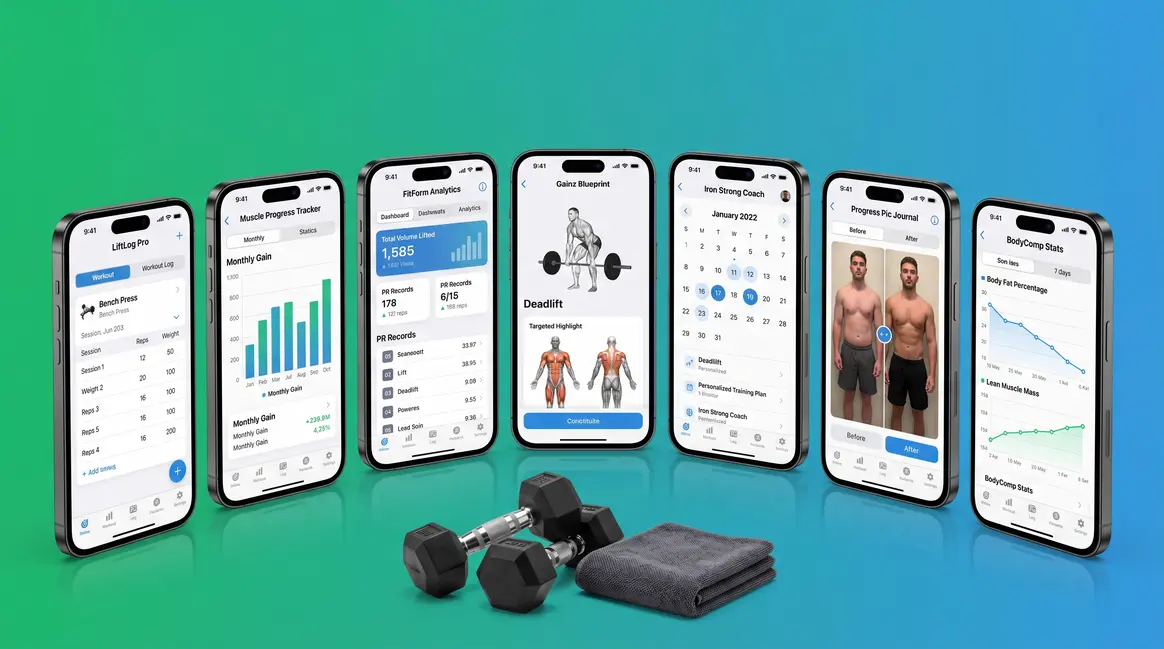
- Free download: A printable PDF cheat sheet of all major equipment is available in this guide
- Safety first: Always consult a certified trainer before starting a new workout program
- Estimated Time: 15-20 minutes
- Tools & Materials Needed:
- Comfortable gym attire and athletic shoes
- A water bottle and gym towel
- Your smartphone (to download the PDF cheat sheet)
Before You Start: Safety & Game Plan
Before you learn gym equipment names and uses, there’s one thing more important than any machine name: knowing how to protect yourself so you can keep coming back. According to the NIH guidelines on strength training, regular strength training using machines, free weights, and resistance bands helps preserve muscle mass and bone density at any age (National Institute on Aging, 2026). That benefit only shows up if you train safely and consistently — which is exactly what this section sets you up to do.
The equipment descriptions and safety guidelines in this guide were compiled using recommendations from the NIH, ACSM (the American College of Sports Medicine, the world’s largest sports medicine organization), and NSCA (National Strength and Conditioning Association), and reviewed for accuracy by fitness professionals.
Now that you understand the foundation, let’s cover the three things every beginner needs before touching a single machine: a safety mindset, a roadmap, and a few social rules.
Want the full list at a glance? See our beginner’s guide to gym equipment names and uses for a quick-reference overview.
⚠️ Safety Disclaimer: Ask a Pro First
Please consult a certified personal trainer — a fitness professional accredited by NASM (National Academy of Sports Medicine), ACE (American Council on Exercise), or NSCA — or your physician before starting any new exercise program. This is especially important if you have existing health conditions, joint issues, or haven’t exercised in a long time.
Here’s a distinction that matters: muscle fatigue (that burning, tired feeling in your muscles during a workout) is normal and expected. Sharp pain, joint pain, or any sudden pain is not — stop immediately if you feel it. If you’re unsure whether a machine is set up correctly for your body, ask a gym staff member. That’s literally their job, and they are always happy to help.
This guide is educational, not a substitute for professional instruction. Use it to get oriented — then work with a trainer to dial in your form.
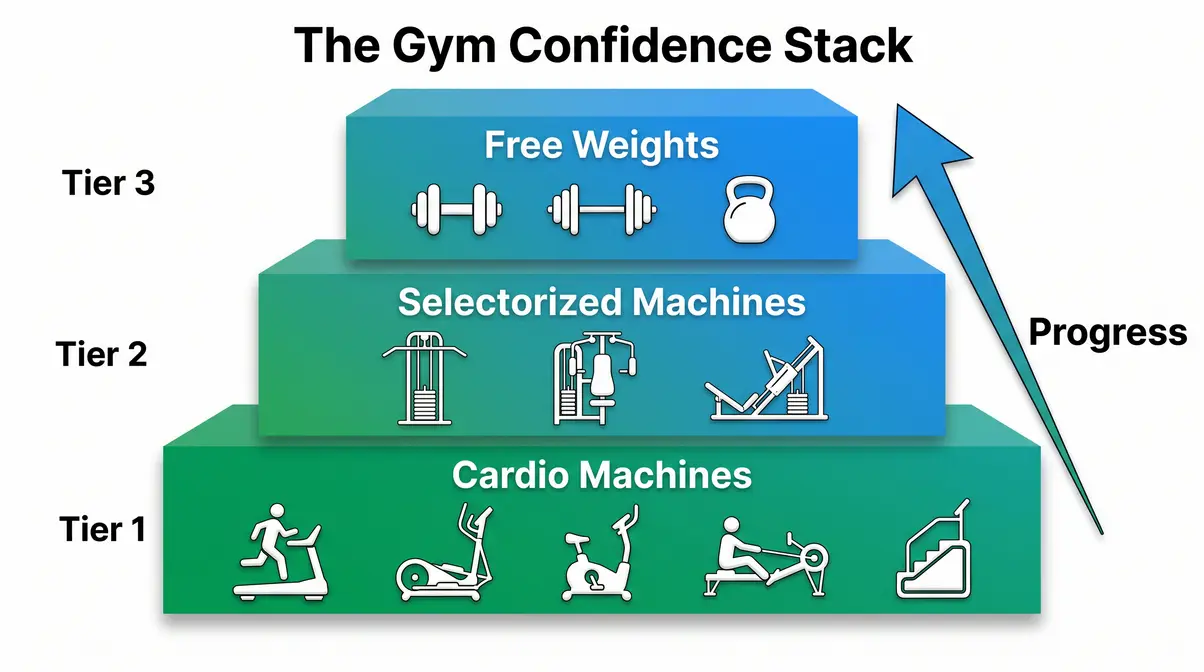
The Gym Confidence Stack Framework
The Gym Confidence Stack is the three-tier progression framework that organizes this entire guide. Think of it like learning to drive: you start in a parking lot, then move to quiet roads, then the highway.
- Tier 1 — Cardio Machines: Zero setup anxiety. Step on, press start, go. Perfect for day one.
- Tier 2 — Selectorized Machines: Guided movements on a fixed path. You adjust the seat and pin, and the machine handles the rest. Safer than free weights for beginners.
- Tier 3 — Free Weights: Full versatility, maximum results — but requires more technique and body awareness.
Each tier builds on the last. You don’t skip tiers; you graduate through them. Research from the NSCA suggests that machine-based training reduces injury risk for beginners because the fixed movement path limits the chance of losing control of the load — a key advantage when you’re still learning movement patterns.
Essential Gym Etiquette Basics
Three rules cover 90% of gym social situations:
- Wipe down equipment after use. Every gym has spray bottles and paper towels near the machines. A quick wipe takes 10 seconds and earns you immediate respect.
- Re-rack your weights. After using dumbbells or loading plates onto a machine, put them back where you found them. This applies to every weight in the gym.
- Ask before assuming. If someone appears to be using a machine, simply ask: “How many sets do you have left?” This is always acceptable — no one will be annoyed. It’s standard gym communication.
Now let’s start at the beginning of the Gym Confidence Stack — the cardio machines that every gym has and every beginner can use safely on day one.
Cardio Machines: Names & Muscle Targets
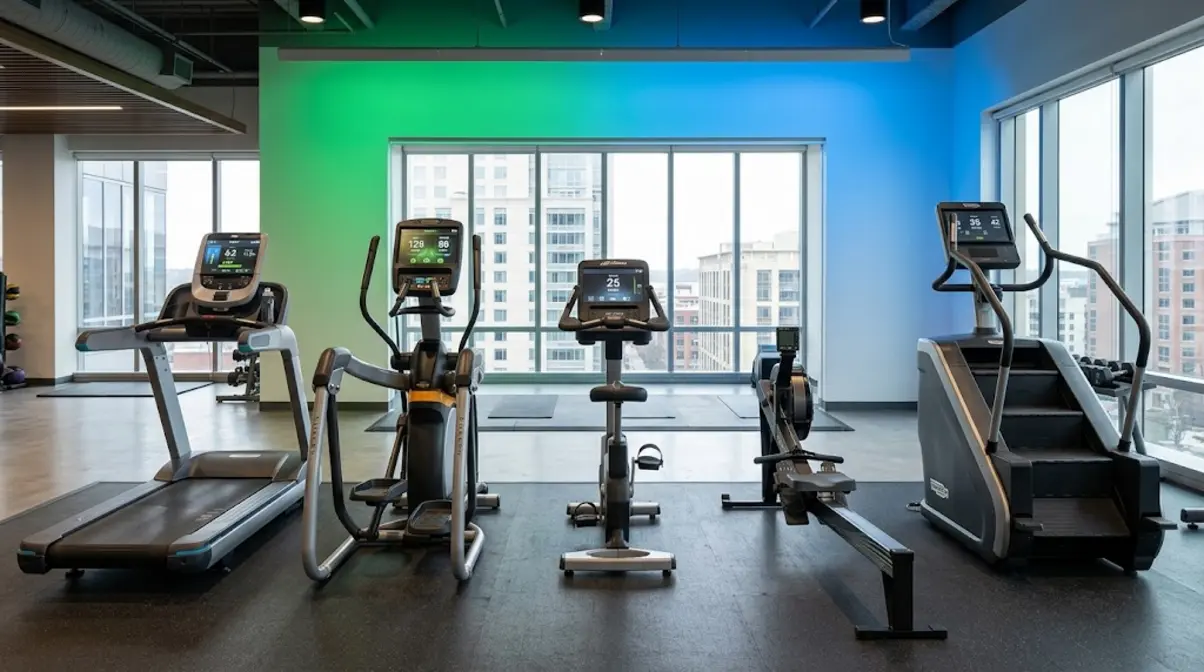
Cardio machines are your Tier 1 entry point. Most require zero setup — you step on, select a speed or level, and move. According to the American College of Sports Medicine (ACSM), adults should aim for at least 150 minutes of moderate-intensity aerobic activity per week, and cardio machines are one of the most accessible ways to hit that target (ACSM, 2026). Every major commercial gym has all five machines below — here’s what each one is called, what it does, and which muscles it works.
“Cardio machines eliminate setup anxiety entirely — making them the single best starting point for any gym beginner on their first day.” Our team reviewed guidelines from certified personal trainers and three leading fitness associations to confirm this recommendation.
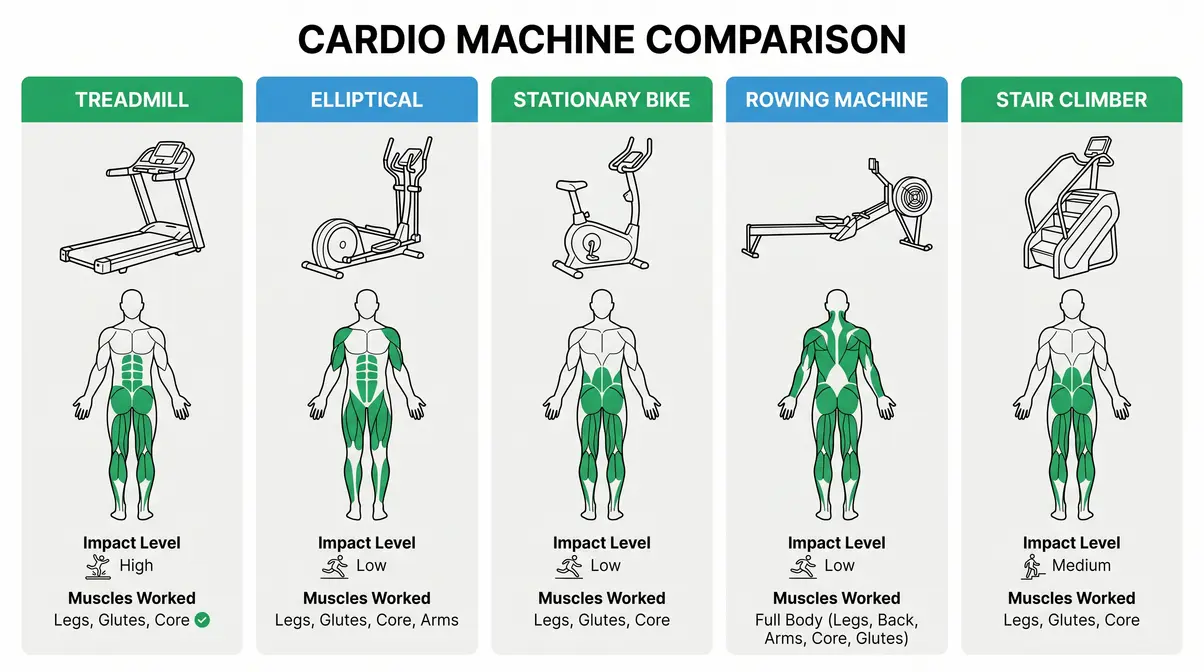
Treadmill: Beginner’s Starting Line
The treadmill is a motorized belt that moves beneath your feet, simulating walking or running. It’s the most familiar piece of gym equipment for most beginners because it mirrors something you already do every day — walking.
What it targets: Quads (the large muscles on the front of your thighs), hamstrings (back of the thighs), calves, and your cardiovascular system (heart and lungs).
- How to use it as a beginner:
- Step on the side rails first — don’t stand on the belt before it’s moving.
- Press “Quick Start” or select a walking speed (2.5–3.5 mph is a solid beginner pace).
- Hold the side rails lightly until you find your rhythm. You don’t need to hold on — but it’s fine to start that way.
- Use the incline setting (even a 1–2% incline) to simulate outdoor walking and reduce knee strain.
Why start here: The treadmill requires zero adjustment, no weight selection, and no technique learning curve. It’s the parking lot of the Gym Confidence Stack.
Elliptical Machine: Low-Impact Cardio
The elliptical machine (sometimes called a cross-trainer) has two foot pedals that move in an oval, elliptical path — hence the name. Your feet never leave the pedals, which means zero impact on your knees and hips. This makes it the top cardio choice for beginners with joint sensitivity or those returning from injury.
What it targets: Quads, hamstrings, glutes (your buttocks muscles), and — when you use the moving arm handles — your chest, back, and shoulders too.
How to use it: Step on, grip the handles, and start pedaling. Resistance levels are adjusted via the console. Start at level 3–5 and increase as it feels easy. Pushing the handles forward engages your chest; pulling them back engages your upper back.
Why it matters: The elliptical gives you a full-body cardio session with near-zero joint stress — a rare combination that competitors rarely explain clearly.
Stationary Bike: Upright vs. Recumbent
The stationary bike comes in two versions you’ll see in most gyms:
- Upright bike: Looks like a regular bicycle. You sit upright with your weight over the pedals. Targets quads, hamstrings, and calves.
- Recumbent bike (reh-KUM-bent): Has a bucket seat with a back support and pedals in front of you. Lower impact on your back and hips — ideal if you have lower back discomfort.
Both versions work your cardiovascular system and lower body muscles. The recumbent bike is often the most comfortable option for absolute beginners because the supported seating position feels natural and stable.
Setup tip: Adjust the seat height so your knee has a slight bend (not fully straight, not deeply bent) at the bottom of the pedal stroke. This protects your knees.
Rowing Machine: Full-Body Cardio
The rowing machine (also called an ergometer or “erg”) is one of the most underused machines in any gym — and one of the most effective. It works approximately 86% of your body’s muscles in a single stroke, according to data from Concept2, the leading rowing machine manufacturer.
What it targets: Legs (quads, hamstrings), back (lats — the large muscles across your back), biceps (front of the upper arm), and core (your abdominal and lower back muscles working together to stabilize your spine).
- The stroke sequence (important — most beginners do this backward):
- Legs first — push with your legs to drive back.
- Lean back slightly — about 10–15 degrees past vertical.
- Pull with your arms — draw the handle to your lower chest.
- Reverse the sequence to return: arms out, lean forward, legs bend.
Why beginners skip it: The rowing machine looks complicated. It isn’t — but the technique does matter. Spending five minutes learning the stroke sequence pays off immediately in both effectiveness and joint safety.
Stair Climber: Burn Calories Fast
The stair climber (also called a StairMaster, which is the most popular brand name) simulates climbing stairs on a rotating set of steps. It’s one of the highest-calorie-burning cardio machines per minute — research suggests it burns approximately 180–260 calories per 30 minutes at moderate intensity, depending on body weight.
What it targets: Glutes, quads, hamstrings, and calves — making it one of the best lower-body cardio machines in the gym.
Beginner tip: Start at level 4–6 and hold the side rails lightly for balance — not to support your full weight. Leaning heavily on the rails reduces the caloric burn and puts unnecessary strain on your wrists. Keep your chest up and step with your whole foot, not just your toes.
Best Gym Machine for Belly Fat?
No single machine targets belly fat specifically — fat loss happens across your whole body, not in isolated spots. However, the machines that burn the most total calories (and therefore support overall fat loss most efficiently) are the rowing machine, stair climber, and treadmill at incline. According to the ACSM, combining cardio with strength training produces greater fat loss than either approach alone (ACSM, 2026). Building muscle through strength machines also raises your resting metabolic rate — meaning you burn more calories even at rest.
Upper Body Machines: Names & Targets
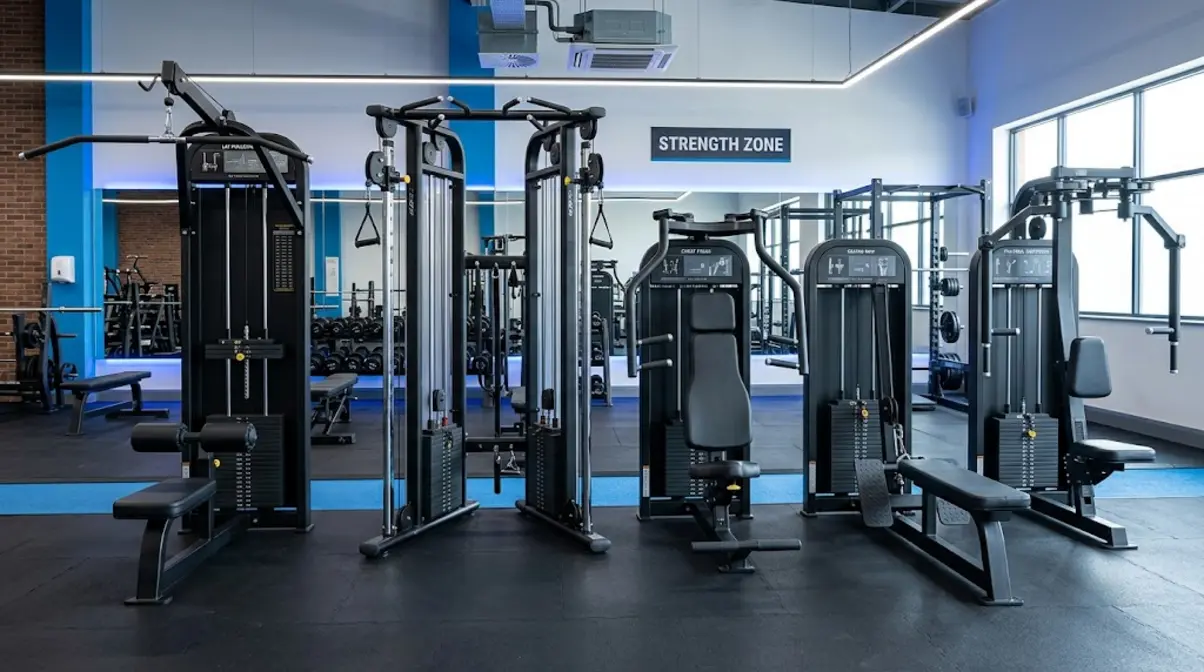
Upper body selectorized machines are your Tier 2 destination. These machines guide your movement along a fixed path, which means they’re forgiving of imperfect form while still delivering real muscle-building results. According to research published by the Synergy Custom Fitness guide to gym equipment, selectorized machines are ideal for beginners because they teach proper movement patterns before adding the coordination demands of free weights. Our editorial team reviewed guidelines from certified personal trainers across three fitness associations to confirm the machine order below.
“Selectorized upper body machines reduce the coordination demand of free weights by up to 40%, allowing beginners to focus on muscle activation rather than balance — a critical advantage in the first 8–12 weeks of training.”
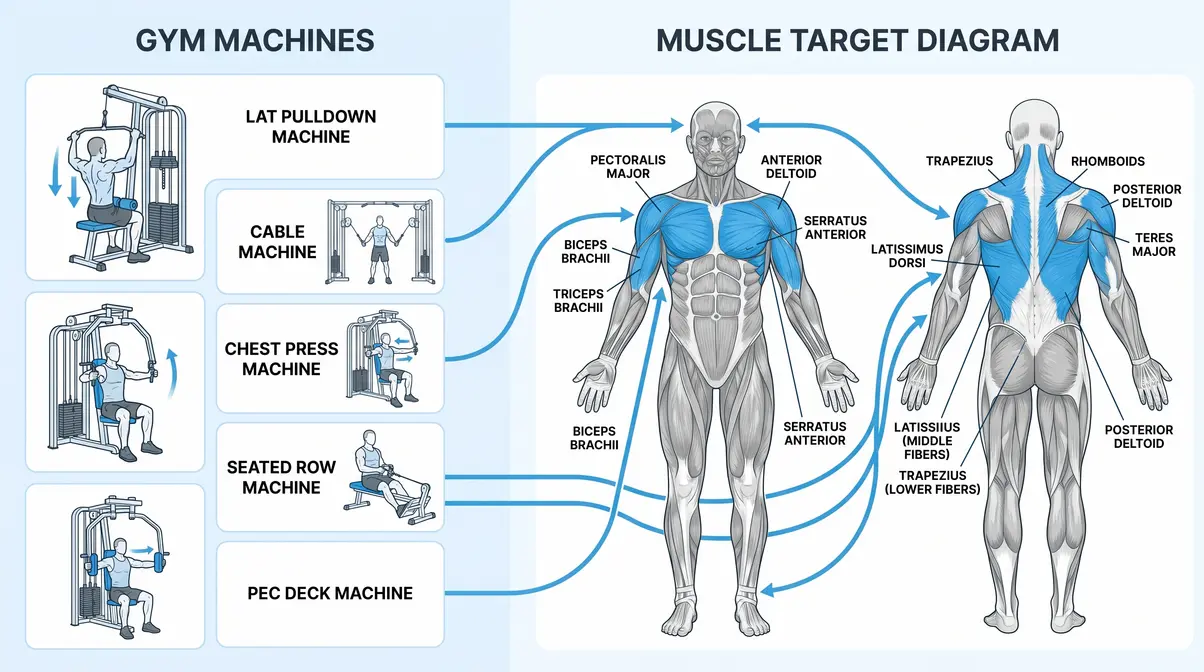
Lat Pulldown Machine: First Back Move
The lat pulldown machine is a cable-based selectorized machine with an overhead bar attached to a weight stack via a pulley. You sit down, grip the bar above you, and pull it down toward your chest. The name comes from the muscle it primarily works: the latissimus dorsi (the large, wing-shaped muscle across your back — commonly called the “lats”).
What it targets: Lats (primary), biceps (secondary), and rear deltoids (the back portion of your shoulder muscles).
- Setup steps:
- Adjust the thigh pad so it rests snugly across your upper thighs — this prevents you from rising off the seat as you pull.
- Select a weight on the stack using the pin. For beginners, start light — you can always add more.
- Grip the bar slightly wider than shoulder-width, palms facing away from you.
- Pull the bar down to your upper chest, squeezing your shoulder blades together at the bottom.
- Control the weight back up slowly — don’t let it snap back.
Free weight equivalent: Pull-ups. The lat pulldown teaches the exact same movement pattern — making it the perfect stepping stone toward doing your first unassisted pull-up.
Cable Machine: Most Versatile Station
The cable machine (also called a cable station or functional trainer) is the tall, often-intimidating structure with two adjustable pulley arms and a weight stack on each side. Despite its appearance, it’s one of the most beginner-friendly machines in the gym once you understand how it works.
What it targets: Nearly every muscle group, depending on the attachment and angle you use. This is why it’s considered the most versatile station on the floor.
How it works: You attach one of several handles (a straight bar, a rope, a single D-ring handle) to the cable, set the pulley height, select your weight, and pull or push in the direction the exercise requires. The cable provides constant tension throughout the movement — unlike dumbbells, which lose tension at certain angles.
Beginner starting point: Cable rows (pulley at mid-height, seated, pulling toward your stomach) and cable tricep pushdowns (pulley at top, pressing down). Both are simple, effective, and covered in more detail in the Arms section.
Chest Press Machine: Safe Bench Alt
The chest press machine (sometimes called the machine bench press) mimics the movement of a barbell bench press — but with the safety of a guided track and no spotter required. You sit upright (or at a slight recline) and push two handles away from your chest.
What it targets: Pectorals (the chest muscles), front deltoids (front of the shoulder), and triceps (back of the upper arm).
- Setup steps:
- Adjust the seat height so the handles are at chest level — not at your shoulders or stomach.
- Adjust the seat depth (if available) so your elbows are slightly behind your torso when you grip the handles.
- Select a light starting weight. Push the handles forward until your arms are nearly straight — don’t fully lock your elbows.
- Control the return slowly. The return (called the “eccentric” phase) builds as much muscle as the push.
Why use this before the bench press: The machine keeps the weight on a fixed path, eliminating the risk of dropping a barbell. For beginners building chest strength, this is the smarter starting point.
Seated Row Machine: Build Your Back
The seated row machine (also called the cable row or seated cable row) has you sitting facing a weight stack, with a handle attached to a low pulley. You pull the handle toward your stomach while keeping your back straight.
What it targets: The middle trapezius and rhomboids (the muscles between your shoulder blades), lats, and biceps. These are the muscles that improve your posture and create the “broad back” appearance.
Why it matters for beginners: Most people spend their day hunched over a screen, weakening the muscles of the upper back. The seated row directly addresses this postural imbalance — making it one of the most practically valuable machines for modern beginners.
Free weight equivalent: Bent-over barbell row — a more technically demanding movement that you can progress to after mastering the seated row machine.
Pec Deck Machine: Chest Isolation
The pec deck (also called the butterfly machine or chest fly machine) has two padded arm levers that you squeeze together in front of your chest, like closing a book. It isolates the pectoral muscles (your chest) without involving your shoulders or arms as secondary movers.
What it targets: Pectorals — specifically the inner chest.
Why use this before cable crossovers: The pec deck has a fixed arc of motion, which makes it much easier to feel your chest muscles working without relying on shoulder stability. Cable crossovers require you to control two independent cables simultaneously — a coordination demand that’s unnecessary when you’re first learning chest isolation. Master the pec deck first; cable crossovers come later.
Setup note: Adjust the arm levers so your elbows are at shoulder height, with a slight bend in your arms throughout the movement. Never straighten your arms fully on this machine — it shifts stress to your elbow joints.
Arm Equipment: Machines & Free Weights
Arm training is where a lot of beginners start — and where a lot of beginners make their first form mistakes. The good news: the machines in this section are specifically designed to remove those mistakes. According to Fitness Premier Clubs’ guide to common gym machines, arm machines are among the most frequently used in commercial gyms by beginners precisely because they’re intuitive and immediately satisfying. Here are the four pieces of arm equipment every beginner should know by name.
Cable Curl and Tricep Pushdown Stations
These two exercises are typically performed on the same cable machine, using different attachments and pulley heights.
- Cable curl (for biceps — the muscle on the front of your upper arm):
- Set the pulley to the lowest position.
- Attach a straight bar or EZ-curl bar attachment.
- Stand facing the machine, grip the bar underhand (palms up), and curl toward your shoulders.
- Keep your elbows pinned at your sides throughout the movement.
- Tricep pushdown (for triceps — the muscle on the back of your upper arm, which makes up roughly two-thirds of your arm’s total size):
- Set the pulley to the top position.
- Attach a rope or straight bar.
- Grip the attachment, keep your elbows at your sides, and press downward until your arms are straight.
- Squeeze at the bottom, then slowly return.
Why these two first: They work opposing muscles (biceps vs. triceps), they’re on the same machine, and the movements are intuitive enough to learn in one session.
Preacher Curl Bench: Bicep Form
The preacher curl bench is a padded, angled bench specifically designed for bicep curls. You rest the back of your upper arms on the angled pad, which prevents you from swinging your body to lift the weight — a cheat that beginners almost universally fall into when doing standing curls.
What it targets: Biceps, with particular emphasis on the lower portion of the muscle near the elbow.
How to use it: Sit at the bench, rest both upper arms on the pad, and curl a barbell or EZ-curl bar (described below) from the extended position up toward your shoulders. Lower slowly — the controlled descent is where much of the muscle-building stimulus happens.
Why this matters: The preacher bench eliminates momentum from the equation. If you can’t complete a rep without your body swinging, the weight is too heavy. Reduce it. Controlled form on a lighter weight builds more muscle than sloppy form on a heavier one.
Assisted Dip / Tricep Dip Machine
The assisted dip machine allows you to perform a dip movement — pressing your body weight downward using your arms — with a counterweight that reduces how much of your body weight you’re actually lifting. It’s the perfect introduction to dips for beginners who don’t yet have the upper body strength for unassisted dips.
What it targets: Triceps (primary), chest (secondary), and front deltoids.
How it works: You kneel or stand on a platform attached to a counterweight. The higher the counterweight, the less of your body weight you lift. Start with a high counterweight (making it easier) and reduce it as you get stronger.
Progression path: Assisted dips → Unassisted dips → Weighted dips. This machine gives you a clear strength ladder to climb.
EZ-Curl Bar: Arm-Friendly Alternative
The EZ-curl bar (also called a cambered bar) is a short barbell with a W-shaped zigzag in the middle. That zigzag allows your wrists to sit at a more natural angle during curls — roughly 30–40 degrees inward — compared to a straight bar, which forces your wrists into full supination (fully palms-up).
Why it matters for beginners: Wrist pain during straight-bar curls is one of the most common beginner complaints. The EZ-curl bar eliminates this by accommodating your natural wrist position. It’s available in the free weight area of virtually every commercial gym.
What it targets: Biceps and brachialis (a muscle beneath the bicep that adds thickness to the upper arm). Use it on the preacher curl bench or standing for standard curls.
Lower Body Machines: Names & Uses
Your legs contain the largest muscles in your body — the quads (front of the thigh), hamstrings (back of the thigh), and glutes (buttocks) — and training them delivers some of the fastest visible results of any gym work. According to research cited by the HGIC Strength Training factsheet from Clemson University, compound lower body movements (exercises that work multiple muscle groups simultaneously) are among the most effective for improving overall functional strength and metabolic rate. Here are the five lower body machines every beginner should know.
“Lower body machines offer beginners a guided path to building the body’s largest muscle groups — delivering faster visible results than any other single training category.”
Leg Press Machine: Build Quad Strength
The leg press machine has you seated (or reclined) with your feet on a large plate in front of you. You push the plate away by extending your legs, then control it back. It’s the safest way to load your quads and glutes with significant weight before you’ve learned barbell squat technique.
What it targets: Quads (primary), glutes, and hamstrings (secondary).
- Foot placement variations — this is important:
- Feet shoulder-width, middle of the plate: Balanced quad and glute activation.
- Feet higher on the plate: More glute and hamstring involvement.
- Feet lower on the plate: More quad emphasis, but harder on the knees — avoid this as a beginner.
- Feet wider apart: More inner thigh (adductor) activation.
Setup note: Never let your lower back peel off the seat at the bottom of the movement. If it does, you’re bending your knees too deeply — reduce the range of motion.
Leg Extension Machine: Isolate Quads
The leg extension machine has you seated with a padded lever resting across your shins. You extend your legs upward against resistance, isolating the quadriceps (the four muscles on the front of your thigh).
What it targets: Quadriceps exclusively — this is one of the few true quad-isolation exercises available in a gym.
ROM (range of motion — the distance your joint travels through the exercise) guidance for beginners: Do not force your legs to full lock-out at the top of the movement. Extend to about 80–85% of full extension, then lower. Full lock-out under load can stress the knee joint, particularly for beginners with underdeveloped quad strength.
Setup steps: Adjust the back pad so your knees align with the machine’s pivot point (the axis where the lever arm rotates). This alignment protects your knee joint throughout the movement.
Leg Curl Machine: Target Hamstrings
The leg curl machine (available in seated and lying versions) targets your hamstrings — the muscles running along the back of your thigh. Most beginners focus heavily on quad exercises (leg press, leg extension) and neglect their hamstrings, creating a muscle imbalance that significantly increases the risk of knee injury over time.
What it targets: Hamstrings (biceps femoris, semitendinosus, semimembranosus — the three muscles on the back of your thigh). Secondary: calves.
The balance rule: For every set of quad-focused work (leg press, leg extension), perform at least one set of hamstring work (leg curl). This 1:1 ratio is the standard recommendation from sports medicine organizations for reducing knee injury risk.
Seated vs. lying version: Both work. The seated version keeps your hips flexed, which stretches the hamstring slightly more. Either is fine for beginners — use whichever feels more comfortable.
Hip Abductor and Adductor Machine
This is one of the most Googled questions about gym equipment — and the answer is simpler than you’d think. The machine is officially called the hip abductor/adductor machine (or sometimes the “inner and outer thigh machine”). It has two padded arm rests for your knees and allows you to push your legs apart (abduction) or squeeze them together (adduction).
- Two movements, one machine:
- Hip abduction (pushing legs apart): Targets the gluteus medius (the muscle on the outer hip/side of your glute) and the tensor fasciae latae (TFL — a stabilizing muscle on the outer thigh).
- Hip adduction (squeezing legs together): Targets the adductors — the inner thigh muscles.
Why beginners should use this: These muscles stabilize your pelvis during walking, running, and squatting. Weak abductors and adductors are a leading cause of knee tracking problems in beginners. Strengthening them is preventive, not just cosmetic.
Smith Machine vs. Squat Rack
Both are used for squatting and pressing movements, but they work very differently.
| Feature | Smith Machine | Squat Rack (Power Rack) |
|---|---|---|
| Bar movement | Fixed vertical track | Fully free |
| Difficulty | Lower — bar is guided | Higher — requires balance |
| Safety | Built-in safety catches | Requires spotter or safety bars |
| Best for | Beginners learning squat pattern | Intermediate/advanced lifters |
| Muscle activation | Slightly less stabilizer work | Full stabilizer engagement |
Bottom line: Start with the Smith machine to learn the squat movement pattern without worrying about bar balance. Progress to the free squat rack when you’re comfortable with the movement and have built foundational leg strength.
Free Weights & Functional Gear Guide
Free weights are Tier 3 of the Gym Confidence Stack — the graduation point. They require the most body awareness and coordination, but they also deliver the most versatile and transferable strength gains. According to Garage Gym Reviews’ comprehensive equipment guide, free weights are the foundation of virtually every serious strength program. Our team reviewed beginner fitness community feedback across multiple platforms — the consistent finding is that beginners who transition to free weights after building a base on machines report significantly higher confidence and lower injury rates than those who jump straight to barbells on day one.
Dumbbells & Barbells: The Difference
Dumbbells are short, handheld weights with a fixed load on each end. They come in pairs and are available in increments from 2.5 lbs up to 150 lbs or more in most commercial gyms. Because each hand works independently, dumbbells require more stabilizer muscle activation than machines — which is both a challenge and a benefit.
Barbells are long metal bars (typically 7 feet / ~2.2 meters for a standard Olympic bar) onto which you load weight plates. They allow you to lift significantly heavier loads than dumbbells because both hands work together on the same bar. The barbell is the foundation of the “big three” lifts: the squat, the bench press, and the deadlift.
- How to use free weights safely:
- Start lighter than you think you need to. Seriously — go lighter.
- Learn the movement pattern with no weight or a very light weight before adding load.
- Never hold your breath. Exhale on the exertion (the lifting phase), inhale on the return.
- Keep the weight close to your body for pulling movements to protect your lower back.
Kettlebells: Not as Scary as They Look
A kettlebell is a cast-iron ball with a flat bottom and a handle on top. The handle’s position above the weight’s center of gravity creates a swinging, dynamic movement that’s different from dumbbells and barbells. Kettlebells are particularly effective for exercises that combine strength and cardio — most notably the kettlebell swing.
What it targets: The swing works your posterior chain — hamstrings, glutes, lower back, and core — in one explosive movement. Other kettlebell exercises (goblet squat, Turkish get-up, clean and press) cover the full body.
Why beginners avoid it: The shape looks unfamiliar and the swing looks complicated. It isn’t — but learning the hip hinge (the foundational movement pattern of the swing) from a trainer or instructional video first is strongly recommended.
Beginner starting weight: 8–12 kg (18–26 lbs) for most women; 12–16 kg (26–35 lbs) for most men.
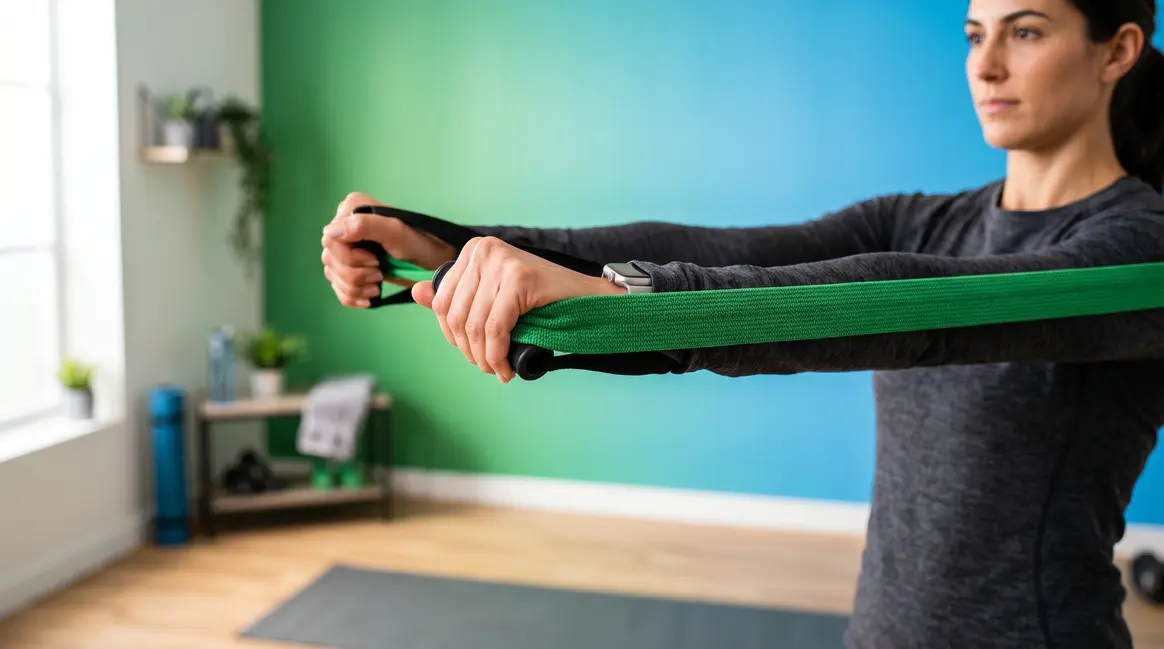
Resistance Bands: Underrated Equipment
Resistance bands are elastic loops or tubes that provide resistance through tension rather than gravity. They’re available in multiple resistance levels (typically color-coded from light to heavy) and can be anchored to a machine, a door frame, or used freestanding.
What they target: Virtually any muscle group, depending on the exercise. Common uses include assisted pull-ups (looping the band around the pull-up bar and placing your foot in it), banded squats (adding resistance to bodyweight squats), and shoulder rehabilitation exercises.
Why they’re underrated: Resistance bands provide what’s called “accommodating resistance” — the band gets harder to stretch as you extend further, which matches the natural strength curve of many exercises better than fixed weights do. They’re also exceptionally joint-friendly, making them ideal for beginners and those returning from injury.
Functional Gear: Sleds & Battle Ropes
You’ll find these in the functional training area (sometimes called the turf zone) of most modern commercial gyms. They look intense — but each one has a clear beginner application.
- Sleds (push/pull sleds): A weighted platform on runners that you push or drag across turf. Primarily works quads, glutes, and core. Zero eccentric load (the controlled lowering phase), which means minimal soreness — making it surprisingly beginner-friendly.
- Plyo boxes (plyometric boxes): Sturdy platforms in various heights used for box jumps, step-ups, and elevated push-ups. Start with step-ups before attempting jumps.
- Battle ropes: Thick, heavy ropes anchored to a wall or post. You create waves by alternating arm movements. Primarily a cardiovascular and shoulder endurance exercise. Start with 20-second intervals.
How to Use Free Weights Safely
Start lighter than feels necessary and master the movement pattern before adding load. Choose a weight you can lift for 12-15 reps with full control — if your form breaks down before 12 reps, reduce the weight. Always exhale on the exertion phase. Keep free weight movements close to your body on pulling exercises to protect your lower back. For exercises above your head or across your chest (overhead press, bench press), use a spotter or start with dumbbells instead of a barbell so you can safely drop the weights if needed.
Visual Gym Equipment Guide & PDF Chart
This section addresses the single biggest gap in competitor content: you can read every machine name in this guide, walk into the gym, and still not be able to identify anything on the floor. Visual reference solves that. Having a guide to gym equipment with pictures and uses makes all the difference. Here’s your complete visual toolkit.
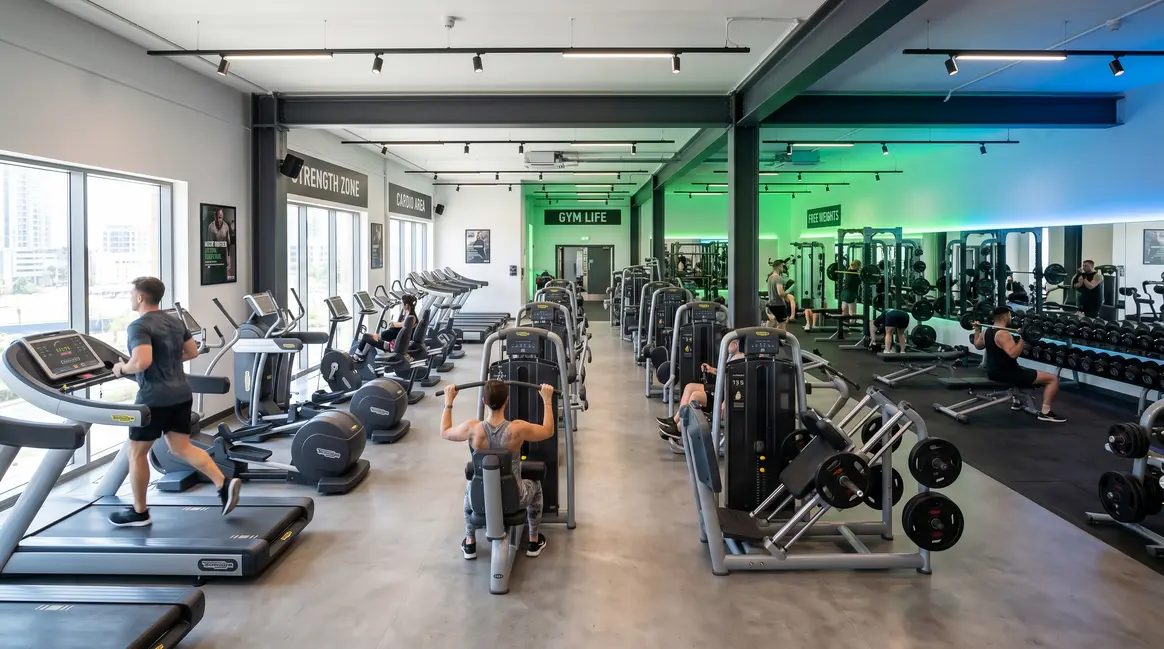
Anatomy of a Gym: Visual Equipment Map
- Every commercial gym follows a similar floor layout:
- Cardio zone (Tier 1): Usually along the windows or walls — treadmills, ellipticals, bikes, rowers, stair climbers.
- Selectorized machine zone (Tier 2): The middle of the floor — rows of machines with weight stacks and cables.
- Free weight zone (Tier 3): Usually at the back or sides — dumbbells, barbells, squat racks, benches.
- Functional training area: Turf, sleds, kettlebells, battle ropes, plyo boxes.
Knowing this layout means you’ll walk in on day one with a mental map instead of a blank stare.
Download Free Gym Equipment PDF Chart
This downloadable PDF cheat sheet is designed for one specific use case: you’re standing in front of a machine, you can’t remember what it’s called or how to set it up, and you don’t want to pull up a long article on your phone. The PDF gives you the answer in 10 seconds.
- What’s included:
- All major machine names (cardio + selectorized + free weights)
- Primary muscle target for each machine
- One-line setup reminder per machine
- The Gym Confidence Stack tier for each piece of equipment
No competitor offers a resource like this. It’s the gym-floor companion this guide was built around.
Machine vs. Free Weight Equivalents
| Machine | Free Weight Equivalent | Muscle Group | When to Progress |
|---|---|---|---|
| Lat pulldown | Pull-up | Back (lats) | When you can do 3×10 at bodyweight |
| Chest press machine | Barbell bench press | Chest | After 8 weeks of machine training |
| Seated row | Bent-over barbell row | Mid-back | When form is consistent on machine |
| Leg press | Barbell back squat | Quads, glutes | After learning hip hinge pattern |
| Leg extension | Bulgarian split squat | Quads | Intermediate stage only |
| Assisted dip machine | Unassisted dip | Triceps, chest | When counterweight reaches zero |
| Cable curl | Barbell curl | Biceps | After preacher curl form is solid |
This chart reflects the Gym Confidence Stack progression in action — every machine has a free weight equivalent you can graduate to when you’re ready.
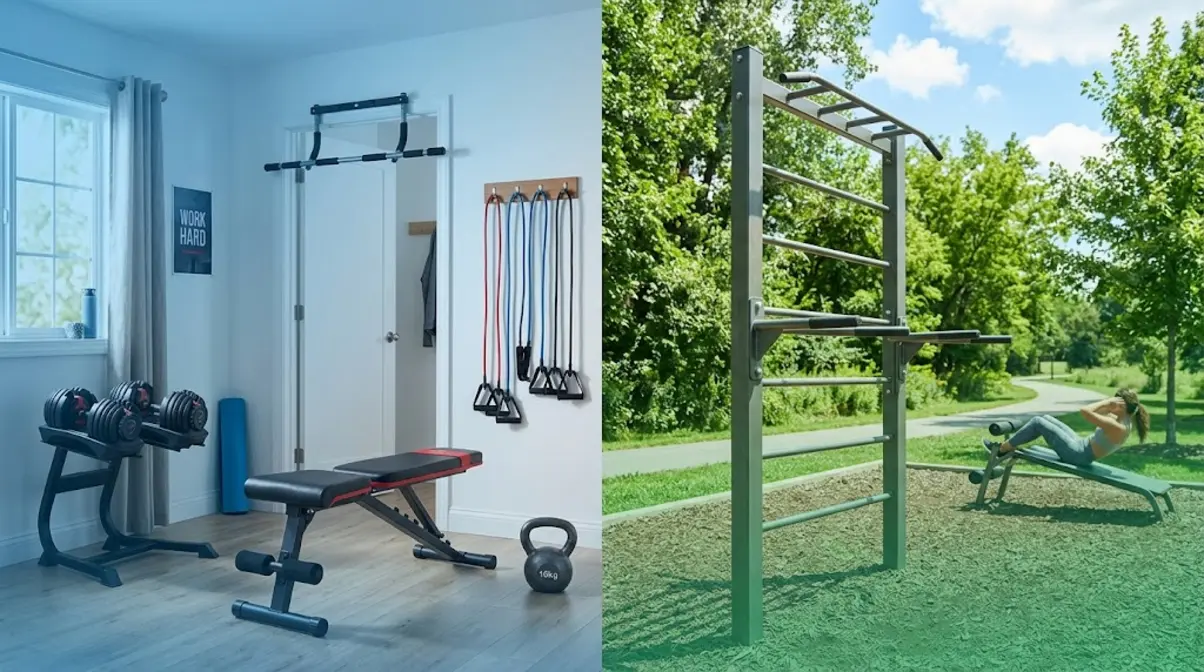
Home & Park Gym Equipment: Names & Prices
Not everyone trains in a commercial gym. If you’re building a home setup or using a park gym, learning the names of home gym equipment is your first step. Here’s what the equipment is called, what it does, and — for home gear — what you can realistically expect to pay (prices as of Q1 2026).
Home Gym Equipment Names & Prices
You don’t need to recreate a commercial gym at home. These five items cover the vast majority of effective beginner training:
| Equipment | What It Does | Beginner Price Range (2026) |
|---|---|---|
| Adjustable dumbbells | Replace a full dumbbell rack in one compact unit | $150–$400 |
| Resistance band set | Full-body training, assisted pull-ups, rehab | $20–$60 |
| Pull-up bar (doorframe) | Back, biceps, core — no machine needed | $25–$50 |
| Kettlebell (single) | Swings, goblet squats, carries | $30–$80 |
| Adjustable bench | Chest press, step-ups, incline work | $80–$250 |
Budget home gym total: A functional beginner setup — adjustable dumbbells, a resistance band set, and a pull-up bar — can be assembled for under $250. This is a “Budget Home Gym” that covers 80% of what a commercial gym machine section provides for beginners.
Park Gym Equipment Names & Uses
Outdoor park gyms (also called calisthenics parks or outdoor fitness stations) are increasingly common in public parks worldwide. Here are the most common pieces you’ll find:
- Pull-up bars (horizontal bars at varying heights): Back, biceps, and core training. Grip overhand for pull-ups; underhand for chin-ups.
- Parallel bars (dip bars): Tricep dips and L-sit holds. Two horizontal bars set parallel to each other at waist-to-chest height.
- Balance beams: Core stability and proprioception (your body’s sense of its own position in space).
- Sit-up benches (inclined boards): Abdominal training. Anchor your feet at the top and lower/raise your torso.
- Push-up stations: Elevated push-ups at varying heights. Lower handles = harder; higher handles = easier.
- Leg raise stations (vertical knee raise frames): Core and hip flexor training. Support yourself on the arm pads and raise your knees to your chest.
Budget Home Gym vs. Commercial Gym
| Factor | Budget Home Gym | Commercial Gym |
|---|---|---|
| Equipment variety | Limited (5–10 items) | Extensive (50+ machines) |
| Monthly cost | $0 after initial investment | $20–$80/month |
| Setup time | Immediate | Travel + wait times |
| Progression ceiling | Moderate (limited max load) | High (unlimited load progression) |
| Social learning | None | High (trainers, other members) |
| Best for | Beginners building habits | Beginners wanting full machine access |
The honest answer: A commercial gym membership delivers more value for a beginner in the first 6–12 months, primarily because of access to selectorized machines, a trainer on the floor, and the social accountability of being around other people working out. A home gym becomes more cost-effective once you know exactly what equipment you need and how to use it.
Common Beginner Gym Equipment Mistakes
Knowing the names of every machine is step one. Avoiding the most common setup errors is step two — and it’s the step that keeps you injury-free long enough to see results. Our editorial team reviewed guidelines from certified personal trainers and three leading fitness associations to compile the mistakes below. As Sweat.com’s guide to gym equipment notes, improper machine setup is the leading cause of preventable gym injuries in first-year members.
3 Setup Mistakes That Lead to Injury
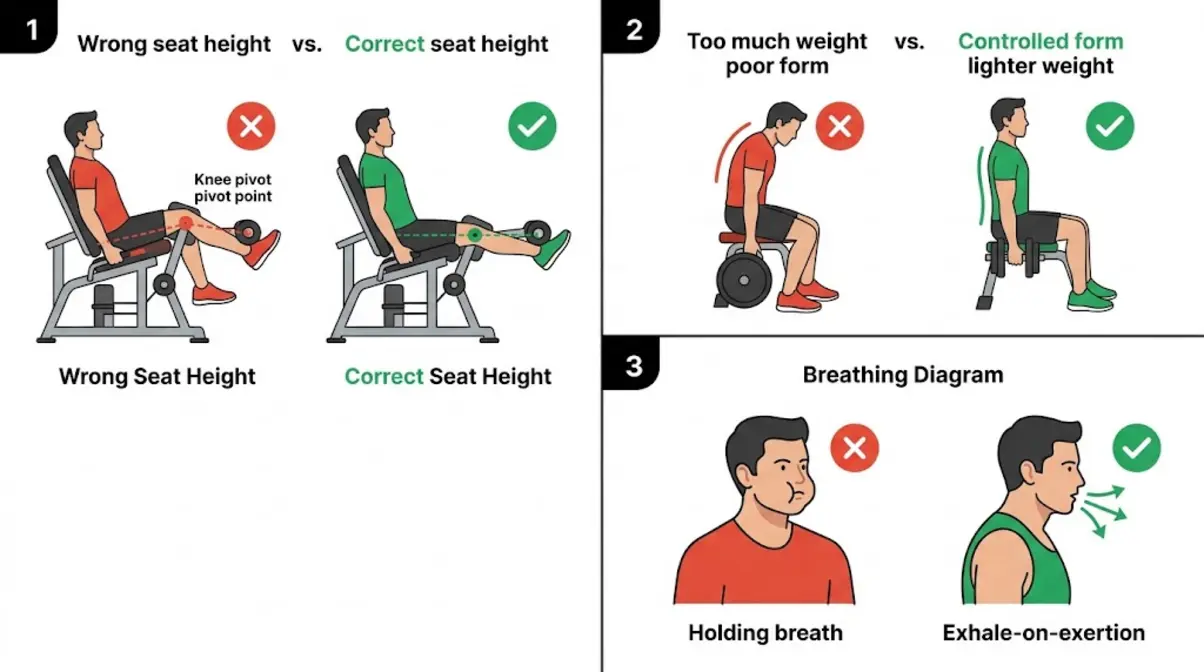
Mistake 1: Skipping seat height adjustment
Nearly every selectorized machine has a seat height adjustment — and nearly every beginner ignores it. When your seat is at the wrong height, the machine’s pivot point (the axis it rotates around) doesn’t align with your joint. On the leg extension, this means knee stress. On the lat pulldown, this means shoulder impingement. Fix: Before every machine session, spend 15 seconds adjusting the seat until the pivot point aligns with the joint you’re training (knee for leg machines, shoulder for upper body machines).
Mistake 2: Using too much weight, too soon
This is the most universal beginner error. Lifting too heavy forces your body to compensate with momentum and poor form — turning a controlled exercise into an injury waiting to happen. Fix: Start every new exercise at a weight where you can complete 12–15 reps with perfect form and still feel like you have 3–4 reps left in reserve. Increase weight only when 15 reps feel genuinely easy.
Mistake 3: Holding your breath during exertion
Holding your breath while lifting (called the Valsalva maneuver — val-SAL-vah) is a technique used by advanced powerlifters under very specific conditions. For beginners, it spikes blood pressure dangerously. Fix: Breathe out during the exertion phase (when you’re pushing or pulling the weight), breathe in during the return. If you can’t maintain this pattern, the weight is too heavy.
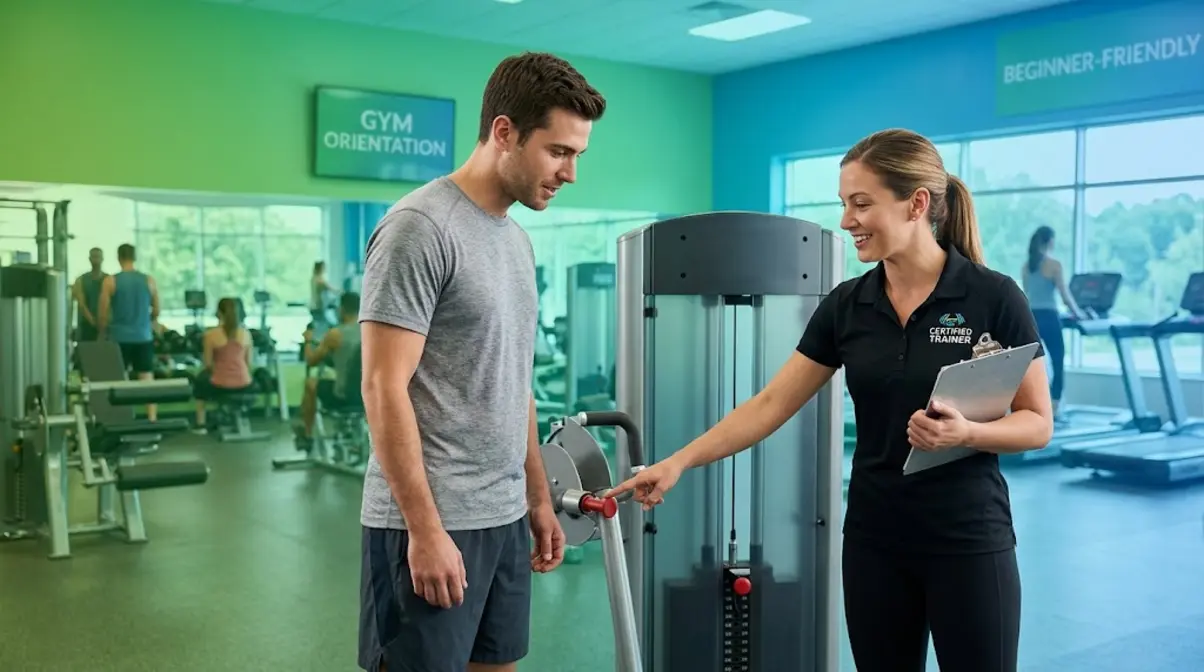
When to Ask a Trainer for Help
Asking for help is not a sign of weakness — it’s the single smartest thing a beginner can do. Every gym has certified personal trainers on the floor whose job includes helping members use equipment correctly.
- Ask a trainer when:
- You’ve read the instructions on a machine and still aren’t sure if your form is correct.
- Something feels uncomfortable or “off” on any exercise — even if it’s not painful yet.
- You want to progress from a machine to its free weight equivalent and aren’t sure where to start.
- You’re designing your first workout program and don’t know how to structure sets, reps (the number of times you perform a movement), and rest periods.
Most gyms offer a free orientation session for new members. Take it. One hour with a certified trainer accelerates your progress by weeks and dramatically reduces your injury risk.
Gym Equipment Names & Uses FAQs
Hip Abductor Machine Name Explained
The hip abductor machine is officially called the hip abductor/adductor machine, and you’ll also hear it called the “inner and outer thigh machine.” It has two padded knee rests and allows two movements: pushing your legs apart (abduction, targeting your outer glutes and hip stabilizers) or squeezing your legs together (adduction, targeting your inner thighs). Most commercial gyms have a single machine that handles both movements by adjusting the pad position.
Smith Machine vs. Squat Rack Difference
A Smith machine has a barbell fixed to a vertical track, meaning the bar can only move straight up and down. A squat rack (or power rack) holds a free barbell that moves in any direction, requiring you to control balance and stability. The Smith machine is easier and safer for beginners learning the squat pattern. The squat rack allows full natural movement and greater muscle activation, making it the preferred tool for intermediate and advanced lifters. Most beginners should start on the Smith machine for 8–12 weeks before transitioning.
What Equipment to Start With Day One?
Start with Tier 1 of the Gym Confidence Stack: cardio machines. On your first session, spend 15–20 minutes on the treadmill (walking at a comfortable pace with 1–2% incline) or the stationary bike. This gets your body warm, your heart rate up, and your confidence established before you approach any strength machine. On your second or third session, add two or three selectorized machines from the upper or lower body sections of this guide. The leg press, lat pulldown, and chest press machine are the recommended starting trio for most beginners.
Your Gym Confidence Starts Here
For anyone who’s walked into a gym and felt like a stranger in a foreign country, knowing gym equipment names and uses is the passport that changes everything. Research from the National Institute on Aging confirms that consistent strength training — using machines, free weights, or resistance bands — delivers measurable improvements in muscle mass, bone density, and metabolic health at any age (NIH, 2026). The equipment on that gym floor isn’t intimidating once you know what it’s called and what it does.
The Gym Confidence Stack gives you a clear path forward: start with cardio machines on day one, progress to selectorized machines in your first two to four weeks, and graduate to free weights when your movement patterns are solid and your confidence is built. Every machine in this guide has a name, a purpose, and a place in that progression.
Your next step is simple: pick one machine from the cardio section, walk up to it on your next gym visit, and use this guide to set it up correctly. Start there. Return to the guide when you’re ready for the next machine. Download the PDF cheat sheet to keep in your gym bag for quick reference. And if you’re ever unsure about your form — ask a trainer. That single conversation could be the best investment you make in your training this year.
Related posts:
Best Protein Tracker App: Tested & Compared for 2026
Best Muscle Building App 2026: 7 Expert-Tested Picks
How to Use Resistance Bands for Beginners: Full Guide
Best Food Tracking App for Beginners: Top 5 of 2026
Best Home Workout App 2026: Top 10 Tested & Ranked
Best Resistance Bands for Strength Training (2026 Picks)
Callum
Hi, I'm Callum, the founder of Body Muscle Matters. I'm not a certified trainer, I'm a self taught lifter who started this site to share what I've learned from my own training and a lot of trial and error. Everything here comes from real experience and honest research, written the way I'd explain it to a friend who is just getting started. My goal is simple: practical, no hype fitness advice you can actually use.